A good outdoor shower turns a backyard into something you actually use every day — not just on weekends. After a swim, a surf, a garden session, or just because it’s 34 degrees and the cold water feels better outside than in.
If you’re planning an outdoor entertaining area or upgrading your backyard, an outdoor shower is one of the most practical additions you can make to an Australian home. It keeps sand and chlorine out of the house, adds genuine value to a pool area, and — done well — looks fantastic.
This guide covers every type of outdoor shower that works in Australian conditions, what each one actually costs, which materials survive coastal salt air, and the plumbing and council rules you need to know before you start.
01.Types of Outdoor Showers
Not every outdoor shower needs full plumbing. The right type depends on where you’re putting it, how often you’ll use it, and whether you want hot water.
1.1Wall-Mounted Showers
The most common setup for Australian homes. A wall-mounted outdoor shower attaches to an exterior wall — typically the back of the house, a garage wall, or a pool house wall.
Why wall-mounted works well:
- Shortest plumbing run from your existing hot water system, which keeps installation costs down
- Easy to add a privacy screen or enclosure around it
- Structural support is already there — no need to pour a footing or anchor a post
A standard wall-mounted outdoor shower head and mixer runs $150–$500 AUD for the fixtures. Installation by a licensed plumber adds $800–$2,500 depending on how far the pipes need to run from your hot water unit.
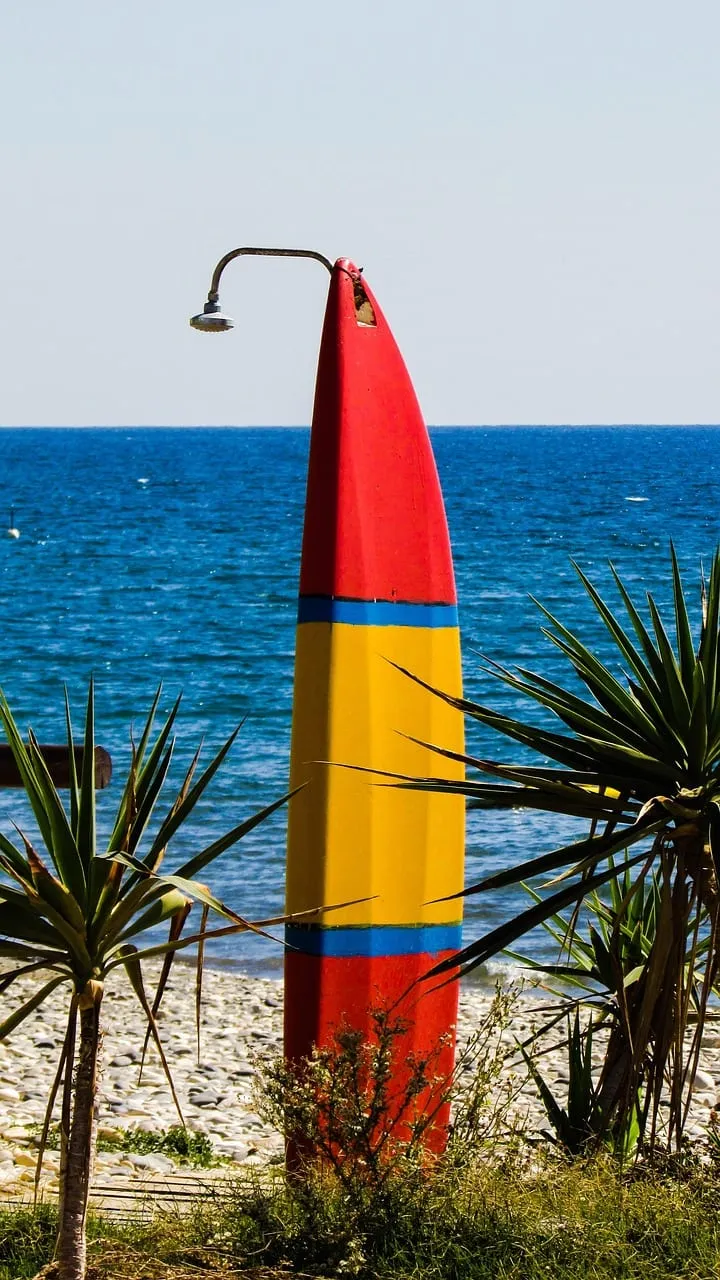
1.2Freestanding Showers
A freestanding outdoor shower sits on its own post or frame, independent of any wall. These are popular for pool areas, backyard landscaping setups, and properties where the house wall isn’t close to where you need the shower.
Best uses for freestanding:
- Pool-adjacent placement where the house is too far away
- Garden or lawn areas where you want the shower as a design feature
- Rental properties or temporary setups (some models are portable)
Freestanding shower posts range from $300–$1,200 AUD for the unit. Solar-heated freestanding models (with a small integrated tank that heats water using sunlight) are a clever option for homes without easy hot water access — they typically hold 20–35 litres and heat to a comfortable temperature on a sunny day.
The trade-off: plumbing a freestanding shower is more expensive because you’re running pipes underground across the yard. Budget an extra $1,000–$3,000 for buried pipework if you want hot and cold water.
1.3Pool Rinse Stations
The simplest outdoor shower. A pool rinse station is a cold-water-only shower post installed next to the pool, designed for a quick rinse before and after swimming.
What makes a rinse station different:
- Cold water only — connects to a garden tap or a simple cold water line
- Usually a single fixture: either a foot wash, a standard shower head, or both
- No drainage infrastructure needed if positioned over pavers or a gravel bed that drains naturally
Pool rinse stations cost $100–$400 AUD for the fixture and can often be installed as a DIY project using a standard garden hose connection. For a more permanent look, a plumber can connect one to your cold water mains for $300–$600.
If your pool area already has a tap nearby, this is the cheapest and fastest outdoor shower option.
02.Hot and Cold vs Cold Water Only
The single biggest cost decision is whether you want hot water.
Cold water only keeps things simple. You connect to an existing garden tap or cold water line, and you’re done. Total cost: $100–$600 AUD depending on the fixture quality and whether you use a hose adapter or a plumbed connection.
Cold-only works well for:
- Pool rinse-off showers
- Quick post-surf or post-beach rinses
- Summer-only use in warmer parts of Australia (Queensland, Northern Territory, northern NSW)
Hot and cold water requires a connection to your home’s hot water system. This is where costs climb — you need a licensed plumber, insulated hot water pipes run to the shower location, and a mixing valve to control temperature.
Expect $2,000–$5,000+ AUD all-in for a hot-and-cold outdoor shower, installed. The main cost driver is distance: if your hot water system is on the opposite side of the house from where you want the shower, the plumbing run alone can cost $1,500–$2,500.
Solar-heated alternatives sit between the two. A freestanding solar shower with an integrated tank costs $300–$1,200 AUD and heats water passively — no plumber required for the heating element. The limitation: water temperature depends on sun exposure, and the tank capacity (usually 20–35 litres) means one or two showers before you’re waiting for it to reheat.
03.Drainage Requirements
Every outdoor shower needs somewhere for the water to go. How you handle drainage depends on how much water you’re using and what your council requires.
3.1Light Use (Garden Hose Showers)
If you’re using a simple garden hose shower over grass, gravel, or garden beds, natural absorption usually handles the water. No formal drainage infrastructure needed — the ground does the work.
This only applies to genuinely occasional use. A shower used daily will saturate the ground and create muddy, waterlogged patches.
3.2Regular Use (Plumbed Showers)
A plumbed outdoor shower used regularly needs proper drainage. The two main options:
Connected to sewer (grey water): The most compliant option. Your plumber connects the shower drain to your existing sewer line. This is required by most urban councils and is the only option if you’re using soap, shampoo, or any cleaning products in the shower — those can’t go into the ground or stormwater system.
Absorption trench or rubble pit: For rural properties or areas without easy sewer access, a rubble-filled pit beneath the shower base absorbs and disperses water into the surrounding soil. This works for water-only rinses (no soap) and needs to be sized for the volume of use.
Key rule: never direct outdoor shower runoff into the stormwater drain. Stormwater goes directly to waterways, and soap or chemical runoff is a compliance issue in every Australian state.
3.3Shower Base Options
The base you stand on matters for drainage:
- Timber decking (slatted): Water drains through the gaps. Looks great, suits coastal homes. Use hardwood like spotted gum or merbau — treated pine rots quickly in constantly wet conditions
- Pebble or river stone: Natural look, excellent drainage. Lay over a gravel bed for absorption
- Concrete with a floor waste: Most durable, connects directly to your drain. Standard for any shower plumbed into the sewer system
- Natural stone pavers: Premium look, good drainage if laid with gaps and a gravel base underneath
04.Privacy Screens and Enclosures
Unless your outdoor shower is fully hidden from neighbours and the street, you’ll need some form of privacy. Australian privacy laws vary by state, but the practical reality is that most people want at least a partial screen.
4.1Screen Materials That Work Outdoors
Hardwood timber battens: The classic Australian outdoor shower screen. Spotted gum, merbau, or blackbutt battens spaced 10–25mm apart give privacy while allowing airflow. Cost: $50–$120 per linear metre of screen, materials only.
Corrugated Colorbond: Durable, low-maintenance, and available in colours that match your roof or fence. A Colorbond privacy screen costs $40–$80 per linear metre installed. Not the most refined look, but it lasts decades.
Bamboo or reed screening: Budget-friendly and easy to install on an existing fence or frame. $15–$40 per roll at Bunnings. Looks great initially but degrades within 2–4 years in direct weather, so treat it as a temporary solution.
Outdoor plants: A living privacy screen using fast-growing hedging plants like Lilly Pilly (Syzygium) or Coastal Rosemary (Westringia). Takes 1–2 growing seasons to fill in but provides a lush, natural enclosure once established. No maintenance cost beyond occasional trimming.
Frosted glass or polycarbonate panels: Modern, clean look that lets light through. More expensive ($100–$200 per panel installed) but extremely durable and low-maintenance.
4.2How Much Screening Do You Need?
For a pool rinse station in a fenced backyard, you may not need any screening at all — the pool fence provides enough privacy.
For a full shower (where you’d undress), aim for screening on at least two sides, with the third side being the house wall if it’s a wall-mounted shower. A three-sided enclosure with an open front (facing away from neighbours) is the most common setup.
Height: 1.8–2.1 metres covers most people comfortably. Match your fence height for a consistent look.
05.Materials That Last in Australian Conditions
Material choice is where most outdoor showers fail. Indoor-rated fixtures corrode, cheap timber rots, and the wrong metal pits and stains within a single season.
5.1Shower Fixtures
Marine-grade 316 stainless steel: The best option for any outdoor shower, and essential for coastal properties. Standard 304 stainless steel (which most “stainless” bathroom fixtures use) develops surface rust near saltwater within 6–12 months. Marine-grade 316 contains molybdenum, which resists chloride corrosion.
Brass (brushed, aged, or raw): Naturally corrosion-resistant and develops a patina that many homeowners prefer. Solid brass fixtures cost more upfront ($300–$700 for a shower set) but last indefinitely with minimal care.
Powder-coated aluminium: Lightweight and rust-proof. A good mid-range option for inland properties. Not recommended within 500 metres of the coastline — salt air can undercut the powder coating over time.
Avoid: chrome-plated fixtures outdoors. Chrome is a surface coating over a base metal, and once the coating chips or scratches (which happens quickly outdoors), the base metal corrodes fast.
5.2Timber Surrounds
For shower enclosures, screens, and decking bases:
- Spotted gum: Australian hardwood, Class 1 durability, resists rot and termites. The top choice for outdoor shower structures
- Merbau: Dense tropical hardwood, excellent water resistance. Bleeds tannin initially (brown staining on surrounding surfaces) but settles after a few months
- Blackbutt: Another strong Australian hardwood, slightly lighter in colour than spotted gum
- Treated pine: Budget option, but not ideal for constant water exposure. Will need re-staining every 1–2 years and has a shorter lifespan in wet conditions
06.Costs in AUD: What to Budget
Here’s a realistic breakdown by shower type:
| Setup | Fixtures | Installation | Total |
|---|---|---|---|
| Garden hose shower (DIY) | $40–$150 | $0 | $40–$150 |
| Pool rinse station (cold, plumbed) | $100–$400 | $300–$600 | $400–$1,000 |
| Solar freestanding (no plumber for heating) | $300–$1,200 | $0–$500 | $300–$1,700 |
| Wall-mounted, cold only | $150–$500 | $500–$1,200 | $650–$1,700 |
| Wall-mounted, hot and cold | $200–$600 | $1,500–$3,500 | $1,700–$4,100 |
| Freestanding, hot and cold (buried pipes) | $300–$800 | $2,500–$5,000 | $2,800–$5,800 |
Add for extras:
- Privacy screen (timber battens, 3 sides): $400–$1,500
- Concrete base with floor waste: $500–$1,200
- Timber decking base: $300–$800
- Drainage connection to sewer: $500–$1,500
A complete outdoor shower setup with hot water, a timber enclosure, and proper drainage typically lands between $3,000 and $6,000 AUD. A basic cold rinse next to the pool can be done for under $500.
For context on how outdoor shower costs compare to other backyard projects, per-square-metre pricing varies widely across structure types.
07.Council and Plumbing Regulations
Australian plumbing regulations are consistent on one point: any work connecting to mains water supply or sewerage must be done by a licensed plumber. This applies in every state and territory.
7.1What You Can Do Yourself
- Attach a garden hose shower head to an existing outdoor tap
- Install a portable or solar freestanding shower that uses a garden hose connection
- Build a timber privacy screen or enclosure (no plumbing involved)
- Lay a gravel or pebble shower base over natural ground
7.2What Requires a Licensed Plumber
- Any new connection to your cold or hot water mains
- Any connection to your sewer or grey water system
- Installing a mixing valve (tempering valve) for hot water
- Running new pipes — above ground or underground
7.3Council Considerations
Most simple outdoor showers don’t trigger a development application. But check with your local council if:
- You’re building a permanent enclosed structure (some councils classify a fully enclosed outdoor shower as a “bathroom” for planning purposes)
- Your property is in a heritage overlay or has specific planning restrictions
- The shower is in a front setback area
- You’re on a rural property with a septic system — grey water rules are stricter
Pool compliance note: if your outdoor shower is inside the pool fence area, it must comply with your state’s pool fencing regulations. The shower itself doesn’t change the pool compliance requirements, but any gate, screen, or structure you add near the fence line might. Get a pool compliance check if you’re modifying anything within the pool barrier zone.
08.Coastal-Specific Considerations
Living near the coast means salt air, sand, and higher humidity — all of which shorten the life of the wrong materials.
8.1Salt-Resistant Fixture Selection
Within 1 kilometre of the coastline (and closer in exposed locations), only use:
- 316 marine-grade stainless steel for shower heads, mixers, and any exposed metal
- Solid brass as an alternative — avoid brass-plated or brass-look finishes over base metals
- 316 stainless or brass screws and fixings — a single standard steel screw in a stainless fixture creates galvanic corrosion that damages both metals
8.2Sand Management
Outdoor showers near the beach serve a dual purpose: washing off salt and removing sand before it gets tracked inside. Consider:
- A foot rinse at the base of the shower (a low-mounted spray nozzle or a shallow trough)
- A slatted timber floor that lets sand fall through rather than pooling
- A small bench or ledge for sitting while rinsing feet — especially useful for families with kids
8.3Exposure and Wind
Coastal properties are often more exposed to wind. A shower enclosure on a windy site needs:
- Solid footings or post anchors (not just surface-mounted)
- Screen panels that allow some airflow rather than catching wind like a sail
- Fixtures rated for outdoor use (weather seals on mixers and valves)
09.DIY Garden Hose Shower vs Proper Installation
A garden hose outdoor shower is the fastest, cheapest way to get an outdoor rinse going. For $40–$150, you buy a garden hose shower head that screws onto a standard garden hose fitting, mount it on a post or wall bracket, and you’re done.
When a garden hose shower is enough:
- Pool rinse-off (cold water is fine after a swim)
- Post-beach sand removal
- Kids playing in the yard on hot days
- Rinsing garden tools, pets, or wetsuits
When you need a proper installation:
- You want hot water
- The shower will be used daily (drainage matters)
- You’re adding it as a permanent home improvement (resale value)
- Soap and shampoo will be used (grey water needs proper drainage)
- You live in a coastal area and need salt-resistant fixtures that last
A proper installation costs more upfront but adds genuine value to the home. Real estate agents consistently note that pool areas with a well-designed outdoor shower photograph better and appeal to buyers — particularly in coastal and subtropical markets.
10.Getting the Design Right
An outdoor shower that looks intentional — rather than bolted on as an afterthought — comes down to a few design decisions:
Match your home’s materials. If your house has timber cladding, use the same timber species for the shower enclosure. If it’s rendered, a clean rendered half-wall with a timber screen above ties everything together.
Keep the palette simple. Brushed stainless or matt black fixtures, natural timber, and one type of stone or paver. The outdoor shower should feel like part of the garden or pool area, not a separate room dropped into the yard.
Plant around it. A few tropical or coastal plants — bird of paradise, frangipani, or ornamental grasses — soften the structure and make it feel integrated with the landscape rather than industrial.
Think about towel storage. A simple hook or rail mounted outside the wet zone saves the awkward drip-walk across the yard. Stainless steel hooks ($10–$30 at Bunnings) or a teak towel rail ($50–$150) are small details that make the shower genuinely pleasant to use.